Why then, do many photographers often tell me they find photographing woodland scenes, chaotic, messy, and frustrating?
It is true, it can be a sensory overload of sorts, with often hundreds of trees in all directions, creating many distractions. It can be hard to know where to start. So, let me share with you some strategies to help you try and find beauty and order amongst the chaos, and fall in love with woodland photography.
The fieldcraft of finding composition is probably the trickiest part
If you’ve never photographed woodland before, grab a map or look on the Woodland Trust website to see what’s around. Many of my favourite tree images are just small clumps of trees on heathland, not necessarily dense woods.
Talk to local dog-walkers - everyone knows a nice woodland somewhere and it is surprising how many you will have driven past and never entered. It just takes one tree to spark your creativity, and chances are, no-one has ever photographed it before!
‘What 3 Words’ is an extremely useful app for geo-tagging locations, making it easier to revisit them in the future. My eye is constantly on the lookout for remarkable trees whenever I am out. Making a list will serve as a good reminder of places to visit in a variety of seasons and conditions.
Be on the lookout for other features which you may be able to incorporate into your compositions. Maybe one tree of a different species stands out from the crowd or has different colour foliage. Puddles can also be a good starting point for a strong composition, along with slopes and hills, or footpaths that lead the eye, transporting the viewer inside your image.
Techniques
Very often, I find myself using a reasonably long focal length when shooting in woodland. A 24-105mm is probably my most used lens, but I often shoot between 100 and 300mm with a longer zoom lens too. It can be a huge help with allowing you to 'minimise the chaos' and include less clutter, by isolating intimate details within a scene. A wide angle will in effect 'spread out' the trees and change the emphasis and feel of a woodland canopy to a more open scene, where the eye often finds it hard to settle. A wider-angle lens is usually reserved for much softer light in a woodland. Excluding the sky with a telephoto lens will keep the eye from being distracted by lighter areas at the top of the frame, especially in bright conditions.
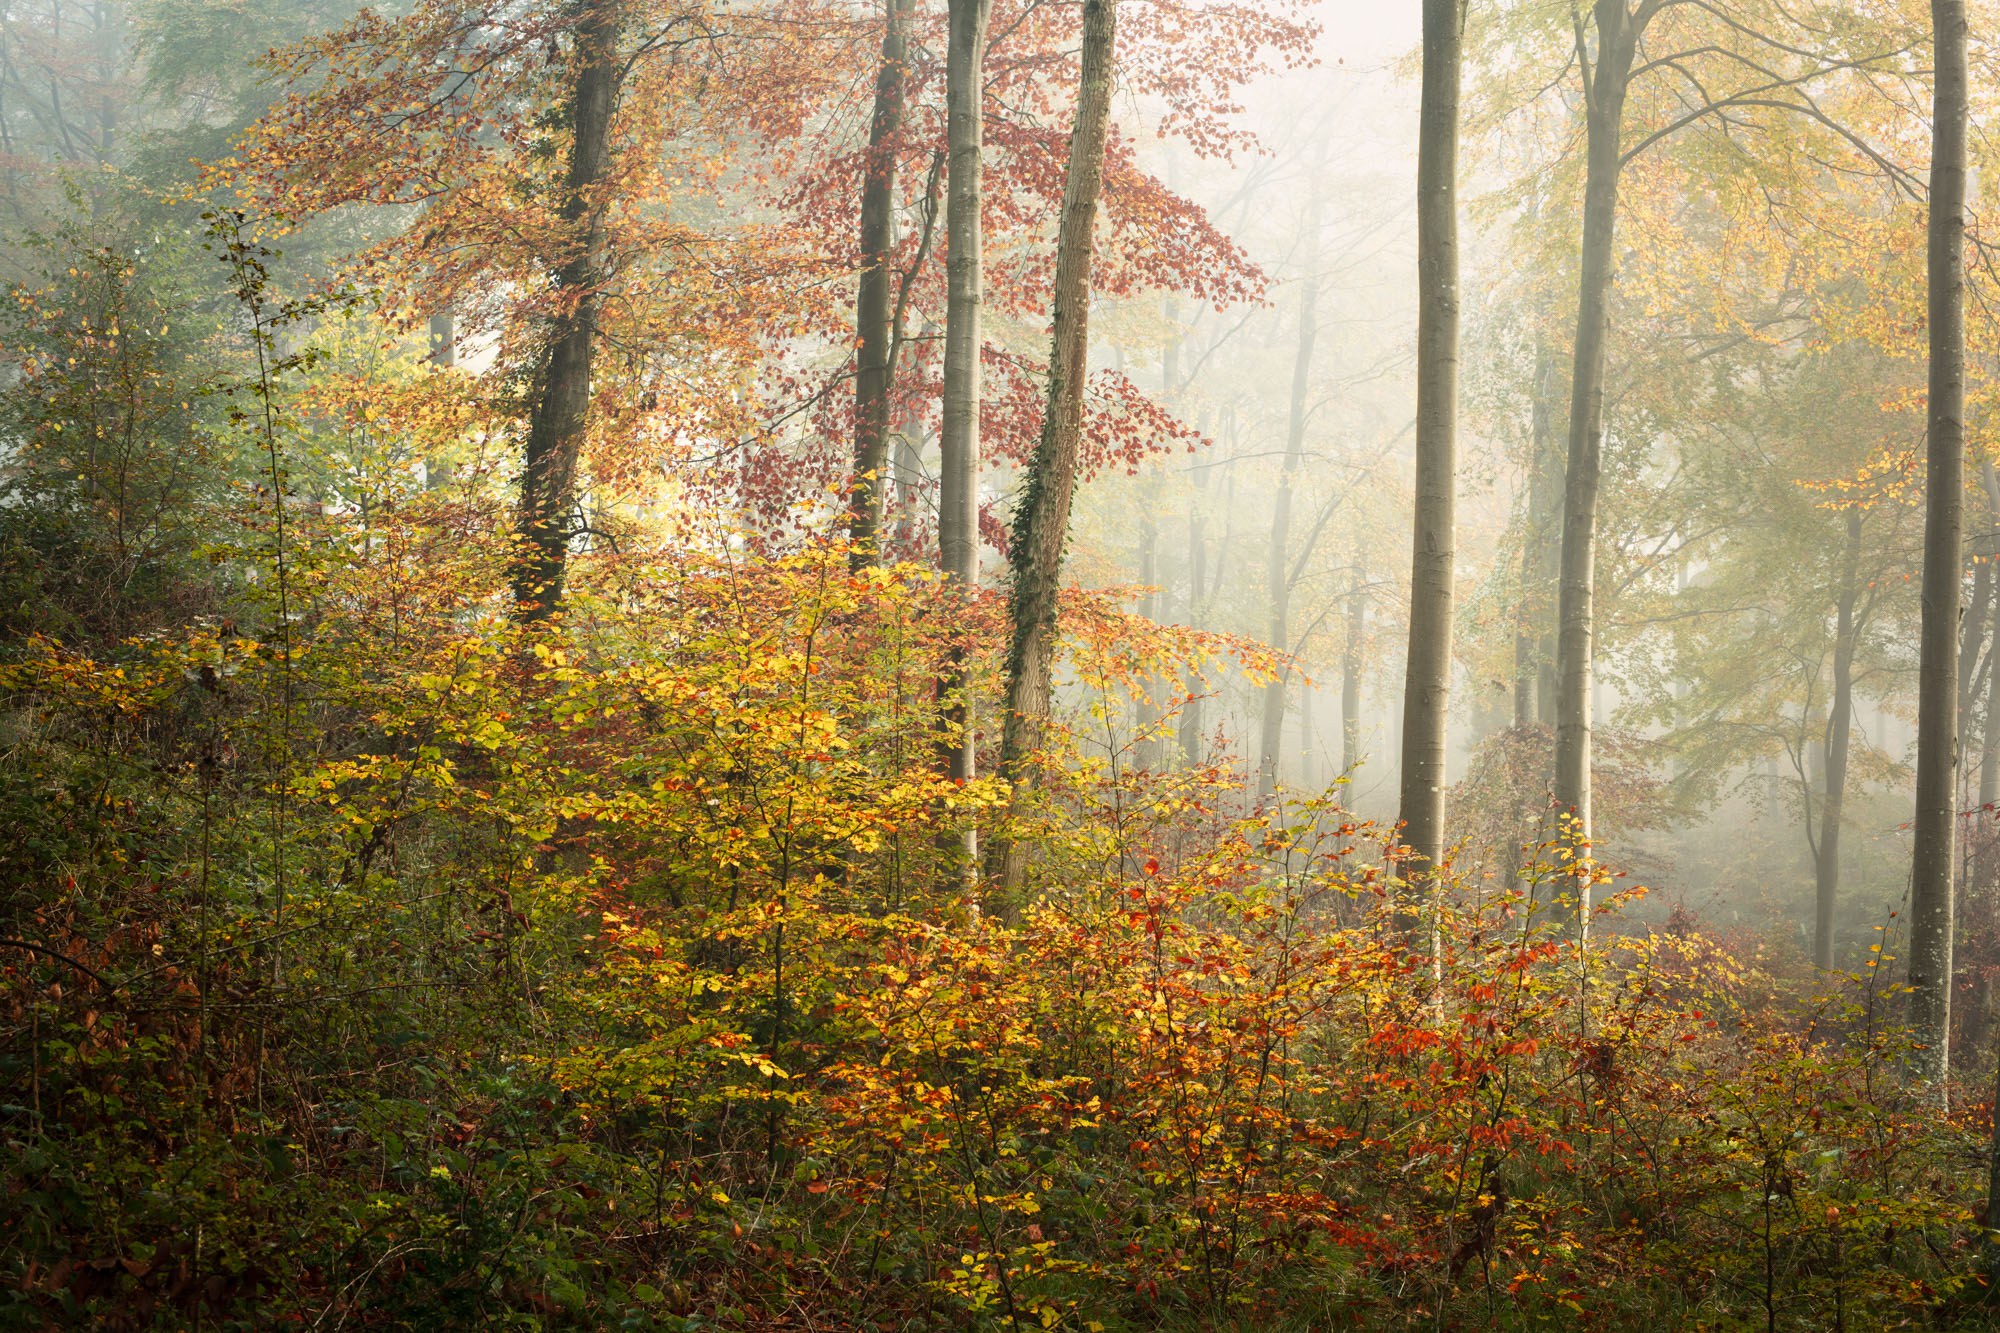
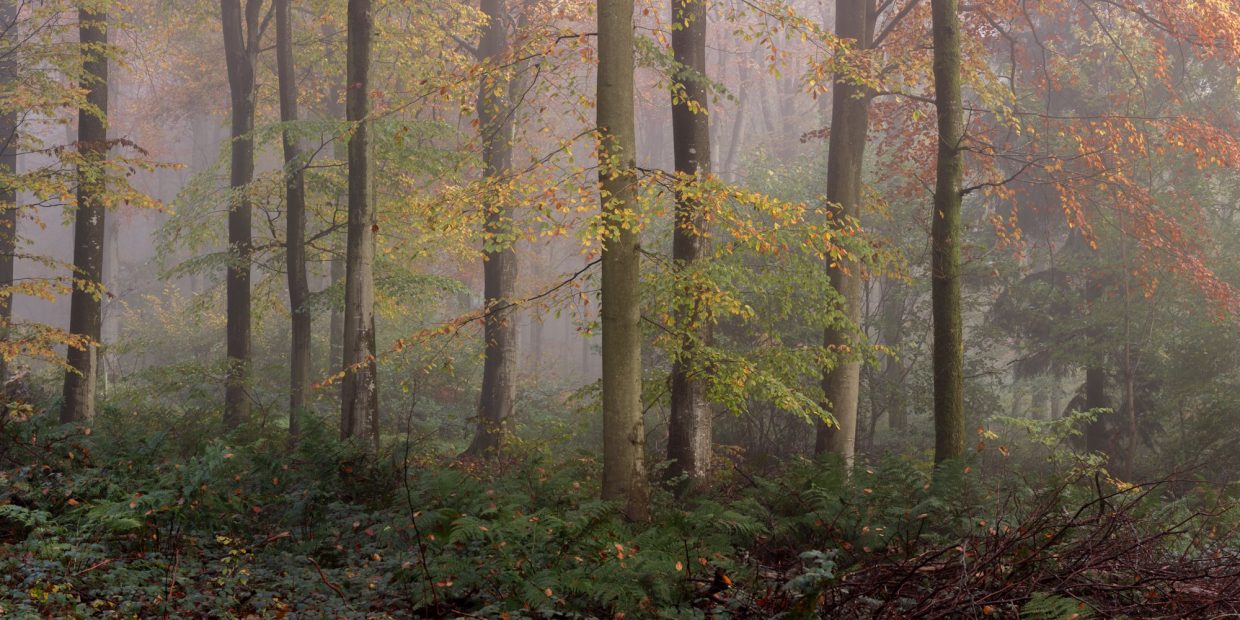
A photography technique that I love to explore when shooting woodland scenes is stitched panoramas. This gives the benefit from long lens compression but also includes a wider expanse of a scene. Six or seven vertical frames stitched together (overlapping a third) should make a decent 2:1 ratio pano. Make sure your tripod is level and expose and shoot from the brightest end of the scene to the darkest. Stitching also means when you come to printing, you can go extra-large to really show of all that detail in the woods.
Come rain or shine, a polarising filter will become your best friend in the woods. Controlling the glare on leaves can make such a huge difference. That is not to say, you want to fully polarise every woodland image, as you can flatten an image too much, but be sure to pay special attention to how the leaves are looking in your images. Use a polariser if they’re looking too contrasty - thousands of glossy leaves can make a scene extremely busy. Each scene is different, so don’t forget to remove it now and again to check you are happy with the results. It’s easiest to find some leaves close to the camera to evaluate the effects of the polariser. Remember to face in the same direction as your composition, as the effects of the polariser will change depending on the direction you are in, in relation to the sun.
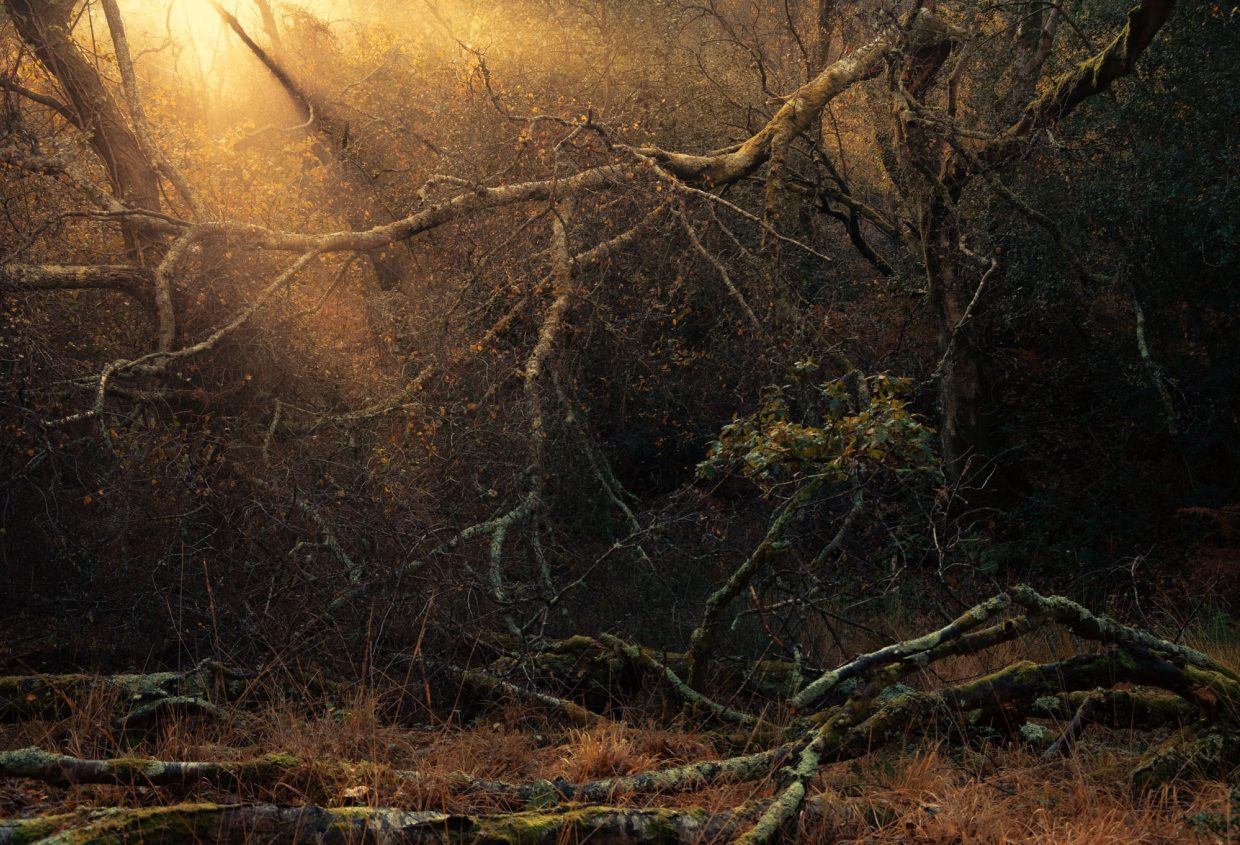
If it is bright and sunny, try shooting into the light. Backlit leaves can look incredible, especially if you can position them in front of darker areas to add contrast. If you carefully position the sun so it’s partially obscured behind a branch or tree trunk, it is possible to create a starburst. Just remember to stop down to a small aperture. This often adds interest in an otherwise, fairly unremarkable area, and will make the final image far more exciting.
Post processing
It’s worth mentioning how nicely woodland images, especially misty ones, respond to processing techniques like split toning (colour grading). It’s possible to evoke a really powerful mood and feel, by targeting tonal adjustments to light and dark portions of the scene. Range or luminosity masks can also be used with great success to hone and tweak colours and tones. Do take care, however which category of LPOTY you enter if you go down the artistic, moody route with your woodland images.
Light & Weather
It is impossible to play down the importance of light when it comes to landscape photography and that is especially true of woodland photography, it almost always makes or breaks the success of an image. So, be patient, and observe the light to see how it changes the woodland in front of you. Just remember, dramatic skies are less of a concern when they are hidden by trees, so do not be afraid to exclude the sky entirely from your composition.
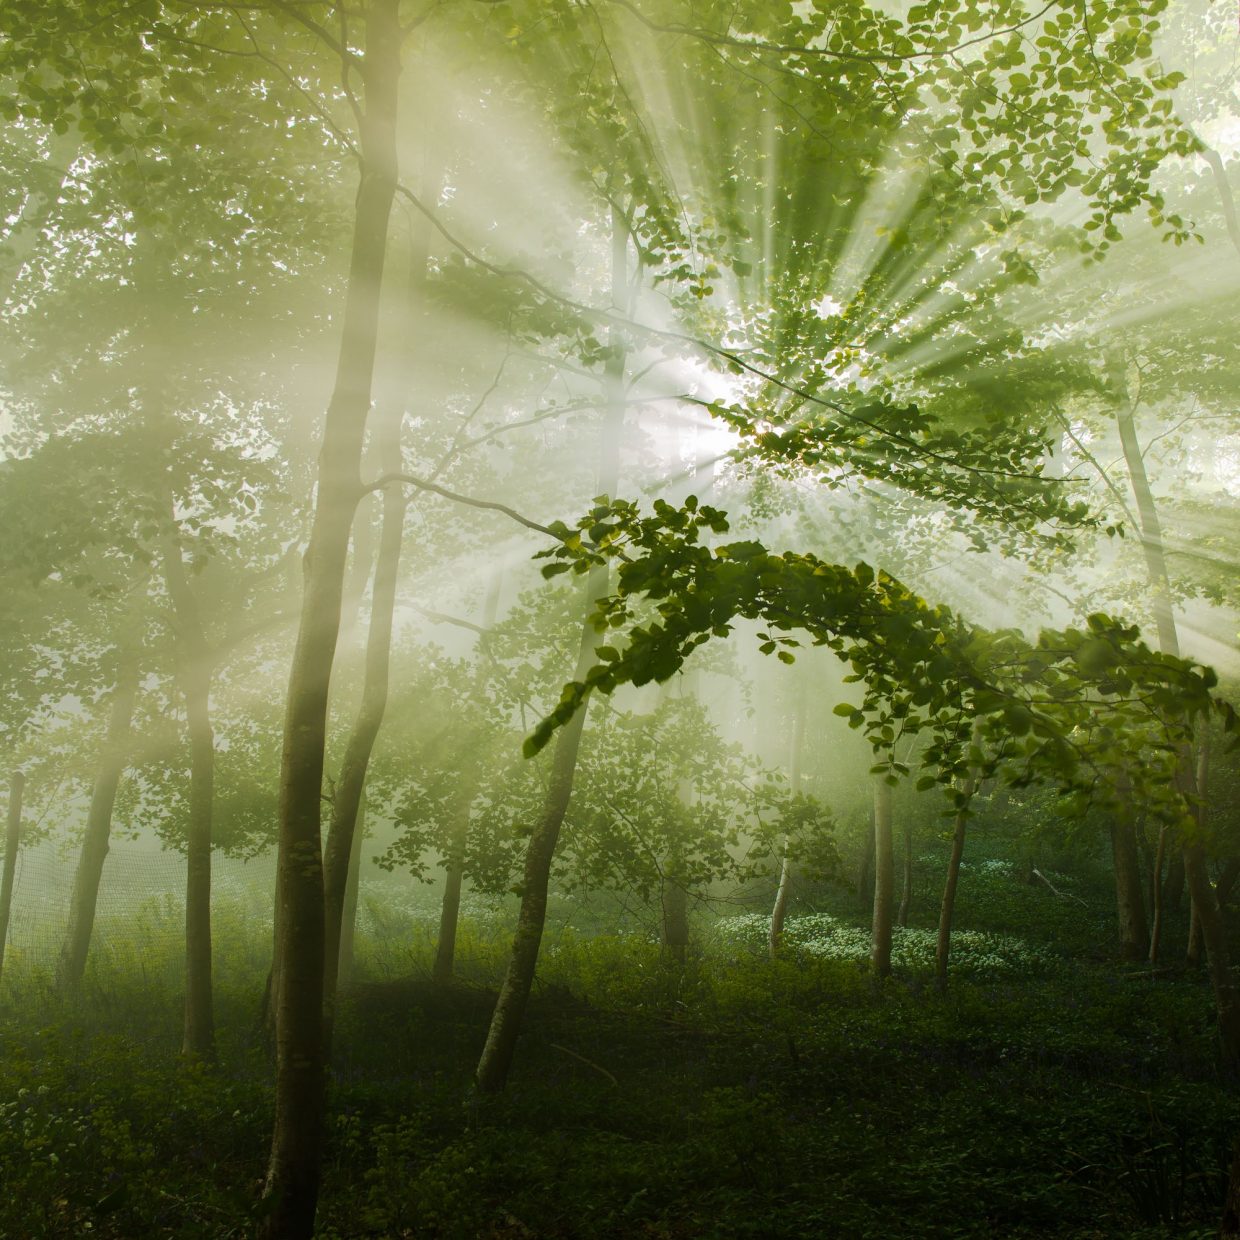
Without a doubt, you will have seen many misty or foggy woodland images. Trees certainly look dramatic as they recede into soft backgrounds. The lack of busy backgrounds allows us to see the individual shapes of the trees in a way that’s, impossible to unravel in bright, clear conditions. As mist begins to clear, especially towards the perimeter of woodland, be ready to shoot into the light in case sunbeams and shadows come through the mist.
Keep your eyes on the weather forecasts and do your recce trips. You may discover that some localised weather patterns start to emerge, and you can better predict when might be a good time to visit. For example, woodland on high ground may often be shrouded in low cloud, while down in low ground, you may find mist or a frost pocket, all of which are ideal for go-to locations and will increase your odds of some epic light.
The beauty of woodland photography is that it is a great backup for those overcast and drizzly days which we surely get an abundance of in the UK. Drizzle is great for adding depth and concealing background distractions. Chances are that a wet, miserable day in the woods will be more fruitful than a wet day on the coast – give it a shot!
-
Text and Photos by Andy Farrer
Lightworx Limited
Eccliffe Mill
Gillingham
Dorset, SP8 5RE
Follow us
![]()
![]()
![]()
©Copyright 2023 Lightworx Limited
Website by Moore-Wilson